
I recently acquired this 1930’s 4 digit Kaywoodie Shellcraft #5651 from Ebay. Being a pre-World War II sandblast and one of my favorite Kaywoodie shapes (51) . I decided to bid on it. The blast looked really nice and looked in general really nice shape.
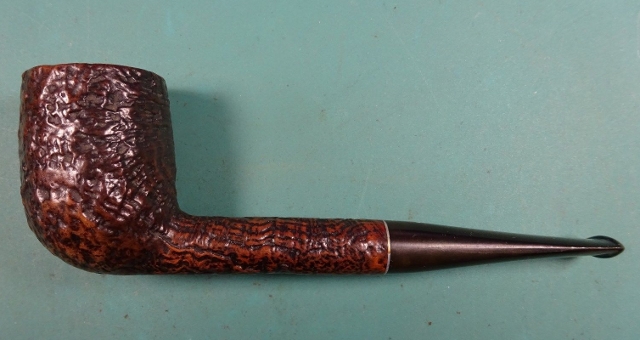
My main concern was it had a meer lining that was damaged about the rim. This is most likely why I won the pipe so easily and with a low bid. I thought well it shouldn’t be that hard of a repair and the seller told me in a message that he could not see any cracks in the bowl. Well we were both wrong, but we will get to that.
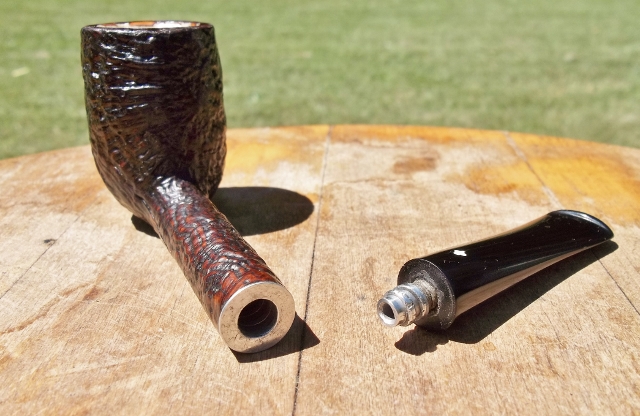
Stem had some tooth marks and the seller had listed the stinger was cut. Again no problem i thought , easily fixed.
Unscrewed the stem and it was indeed cut.
I did some research on the Shellcraft line and they seem to be a rarer Kaywoodie line. I have seen a few on the pre- 1930’s push stem rusticated version’s but was not familiar with the post 1930’s sandblasted synchro stems.
From Pipephil
“The pipe is sandblasted while the early Shellcraft was rusticated. The “drinkless logo” on the stem has been replaced by a clover and a 4 digit shape number has been attributed indicating thus the entry of the Shellcraft into Kaywoodie’s lines.”
I dig some digging in online Magazines on Google and could only find one ad from Popular Mechanics dated Dec.1941. In the 1930’s- early 1940’s five dollars would be about almost a 100 dollars today.
Seems they were made up until the beginning of World War II. All the 1930’s-1941 examples I have found seem to be meer lined and carry the prefix of 56. The pipes are not stamped meer lined so if you run across one be careful with the reamers so that you don’t crack them, they seem to fall prey to that from the only few I could find any pictures of.
I had read and heard from other pipe restores that a old late 19th-early 20th century druggist recipe for fixing broken meerschaum was egg whites and finely ground chalk, so that was what I was going to try and fix the meer lined rim with. It is said to have about the same porous properties of meerschaum and imparts no taste to the tobacco.
To keep this post from being really long I will concern most of it with the meer lining repair and not the clean up itself.
The pipe had been really smoked a lot , more then I thought. In fact the shank diameter was reduced at least by 50% so i spent quite a bit of time just cleaning the shank and the bowl.
Once i got the shank cleaned and carefully removed all the cake and loose meer from the bowl I found the cake was hiding some badly cracked meer. In fact this is the good side, the other side was even worse but the picture turned out to be too blurry to post. Take my word for it ,it was not good. I’m not sure if it was banged too much , smoked too hot or someone tried to ream with a reamer not knowing it was meer lined and it cracked. Well whatever caused it the damage was done and it needed repaired.
I have never repaired a meer lining before and only have owned one meer lined pipe. So this was going to be interesting. After mulling over it for a day or two i decided to just bite the bullet and dive into it.
I cleaned the brair really well and then wiped down it with 91% alcohol so that i could mask it up. I figured this was going to be messy and i read that egg whites and chalk dry hard as a rock so I did not want that all over the pipe. 
I masked it off a little onto the briar so that the mixture could get behind the old meer. I will clean off the excess later …..hopefully.
I got my chalk and pulled out two sticks. I ended up grinding up about six for my total repair.
I ground the chalk into a fine powder with the end of a screwdriver in a stainless steel bowl. Once you think you have got it ground really well……do it some more! The finer it is ground the better.
Separated me a egg white.
My first coat i decided i wanted thin so it could run down into all the cracks. So i mixed it about 1 table spoon to 1 table spoon chalk. I found best way to mix is use back of a spoon or your fingers. I applied the first thin coat. I let dry for about two hours. Be sure to plug up shank hole with a thick pipe cleaner. It does not dry real fast so take your time there is no rush.
2nd thin coat , then again dried for two hours.

3rd coat I made thicker at about 2 to 1 , two parts chalk to one part egg white. I let dry for several hours (about six) before i preceded.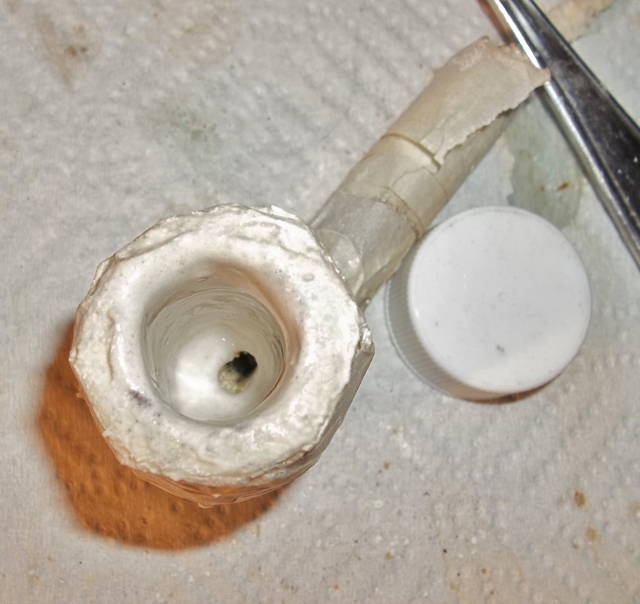
I unmasked the bowl so i could do some cleaning and sanding on the rim.
I ran a file across was so it would ride on the build up and not the briar til it was even with it. I did not want to sand away any of the rim blast if i could help it. Then i cleaned up in the rim blast with a brass wire brush.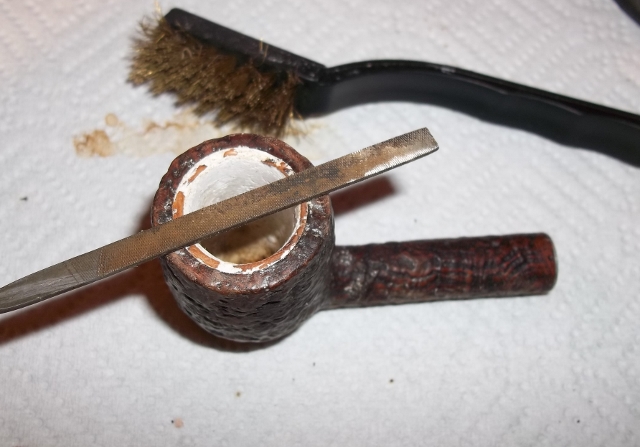
After cleaning it up and running some 220 grit inside the bowl lightly I masked the pipe again for a final coat. This is when you want to take your time and mask it best you can.
I mixed a thick coat this time of 3-4 parts chalk to 1 egg white.
I coated the bowl and rim again, i found on thick coats to dip the finger you use in the egg white so the mixture does not stick to it. This will make it easier to apply and spread. I let this thick coat sit for 24 hours before unmasking.
Afterward same filling and cleanup as before.
I did my final sanding with 500 grit and then a green pad.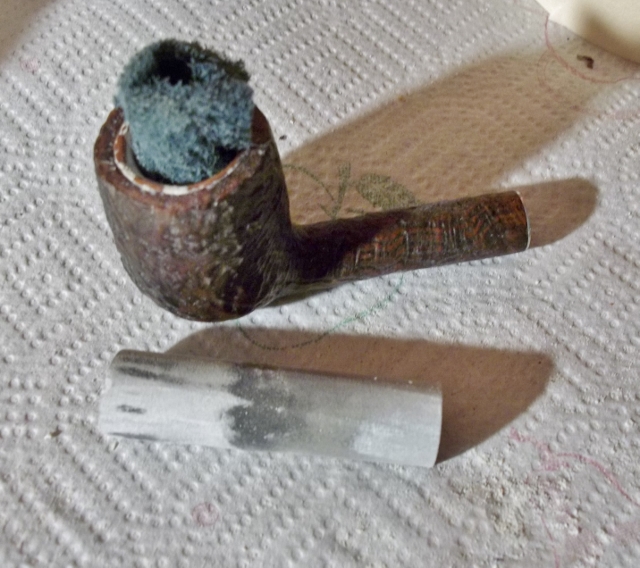
I sanded it down real close to the old meer but not enough to break through. I could not help it on the rim but it is all even.

Afterwards i gave the brair a good rub down with mineral oil.
I was going to remove the cut tenon and replace it wit a proper 4 hole Kaywoodie stinger, in fact i bought a parts pipe with one from a friend before the pipe even showed up.

Well the regular 1930’s 4 hole Kaywoodie stingers do not fit, the diameter is too small and they wont screw into the shank.
After doing some online looking i found some pictures of another 4 digit Shellcraft that sold on Etsy back in 2013. It has a long shaft 4 hole stinger unlike the shorter ones I have in all my 4 digit ones.

Here is another picture of one. If anyone has a parts one for sale let me know please.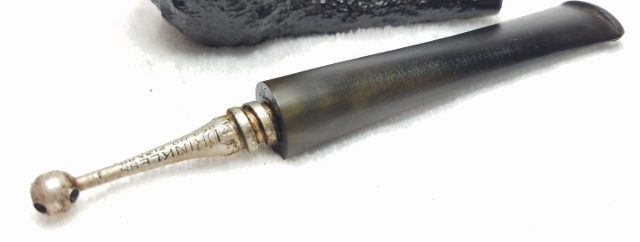
I’m not sure if these are specific to all Shellcraft’s or just ones of the early 1930’s ? That’s what I need though and I do not have one. In the meanwhile I will have to use the cut tenon.
I got rid of the oxidation, filed, filled the tooth marks, filed the rough cut of the tenon and gave it a good wet sanding.
After that the pipe was ready for some time on the buffer.
I let the pipe cure for a couple of days or so before trying to smoke it.
After mowing the yard later on in the week I decided it was time to try the pipe out. I went outside, took a few pictures and packed her full for a initial smoke.
Finished Kaywoodie Shellcraft #5651

The long shank and short stem of a 51 just really appeals to me.
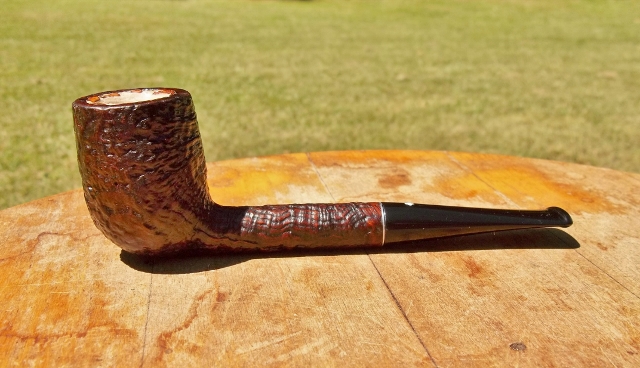


Although I dislike it having a cut sting ,it certainly has a great draw and is easy to clean.
Pipe is stamped 5661… Imported Briar ….. Shellcraft / Kaywoodie
I broke it in with a couple of bowls of 5 Brothers.
I decided to smoke the pipe often for the next few days to see how durable it would be and if it would crack under heat before posting on the blog.
After several days of running my new favorite burley blend Low Country Natural Virginia & Burley ( blended by C&D ) I am very pleased with the results.
Although I was not impressed at first, as the first couple of bowls were rather hot but it settled down after a few more bowls. After getting some seasoning and thin cake I can say it smokes really well and much cooler. No cracks are appearing as well. I get a good taste from the tobacco and the repair is not impacting the taste of it at all. I can not tell that the bowl lining is not pure meerschaum by smoking it.
The more I smoke it the better it is getting. The repair is coloring nicely already and i think in a little time it will be hard to tell there was even a repair.
Til Next Time ,
Good Smokes To You.
I forgot to mention that Kaywoodie reintroduced the Shellcraft in about 2000 but they are completely different pipes and should not be confused with the pre -war ones if you run across one in a estate sale or online auction.

June 10, 2017 at 2:33 am
Reblogged this on rebornpipes and commented:
Thanks Troy for doing this post. It is a procedure I have been wanting to do but have not tried. I read about your work on this one with interest. I really glad that you took a chance on the old method.
LikeLiked by 1 person
June 10, 2017 at 2:39 am
You are welcome Steve and thank you. Its kinda odd mixture to work with and hard to describe. It something you got to mess around with to get the feeling and mixing the right consistency but I think it works excellent.
LikeLike
June 12, 2017 at 4:06 pm
Bookmarking this post for future reference, Troy! Thanks for sharing. I’ve worked on several meer-lined bowls before but haven’t had to repair any of them – yet!
LikeLiked by 1 person
June 12, 2017 at 9:57 pm
Your welcome Charles.
Joe said he has used plaster of Paris with great success and would likely be easier to use, but i was mostly curious about the old recipe and being a old pipe i thought it would be fitting to try it.
LikeLike
June 15, 2017 at 5:27 am
Awesome work Troy. A Meer patch/repair? I have never even thought of such a thing. Very cool! Thanks for details. I’ll have to try this out one day.
LikeLiked by 1 person
June 15, 2017 at 10:15 am
Thank you
LikeLike
June 15, 2017 at 8:08 am
Troy,
Very helpful post. I have shied away from acquiring some Meer-lined pipes because I wasn’t brave enough to figure out how to repair the Meer! This post is definitely going in the folder for future work. Thanks for the descriptions.
LikeLiked by 1 person
June 15, 2017 at 10:15 am
Thanks Dal and you are welcome,
LikeLike
December 31, 2017 at 9:49 pm
Troy, WOW! This will be one to be referred to in the future. When I read chalk and eggs I was skeptical for sure. But, after reading and seeing how it was done I’m sold! One question comes to mind, how did it affect the smoke taste? Again, thanks for the inspiration.
LikeLiked by 1 person
December 31, 2017 at 10:00 pm
Thank you,
As pointed out in the post the repair is just as neutral as meershaum and does not impact the taste whatsoever.
I am still smoking the pipe and with the months of coloring you can not tell the bowl was even repaired now.
LikeLiked by 2 people
January 1, 2018 at 3:42 am
Troy, thanks for the update on the Meer repair! Happy New Year!
LikeLiked by 1 person
January 1, 2018 at 4:49 am
Thank you and Happy New Year to you as well !
LikeLike
Pingback: An Italian Croc Skin Zulu and a Bear of a Meer Lining Repair | rebornpipes
Pingback: A Meer-lining and Crack Repair to Rescue a Doomed Gargantuan Kilimanjaro Made in Tanganyika Bent Billiard | rebornpipes
Pingback: A Second Inning For A Meerschaum Lined Orlik Bent Brandy | rebornpipes